🚀 Deployment Workshop
Note: This workshop was conducted using B&RDK Github, which can be cloned from:
The latest commit on the main branch now contains the complete solution, so some steps in the guide below may no longer be necessary.
1. Setup Web and FTP Server
Create an .env file
Create an .env file and fill it with the necessary information. Use example.env as a reference.
Configure docker-compose.yml
In docker-compose.yml, set your environment variables using the syntax:
{$ENVIRONMENT_VAR_NAME}
Read through the docker-compose.yml file and try to understand each line. Consider the following questions:
- ❓ What is the difference between the FTP and web container images?
- ❓ Why do we use volumes?
▶️ Run the Containers
Run the following command in the terminal to start the containers:
docker-compose up
🌍 Interact with the Frontend
Once the containers are running, open the frontend in your browser at:
http://<EDGE_IP>:5000
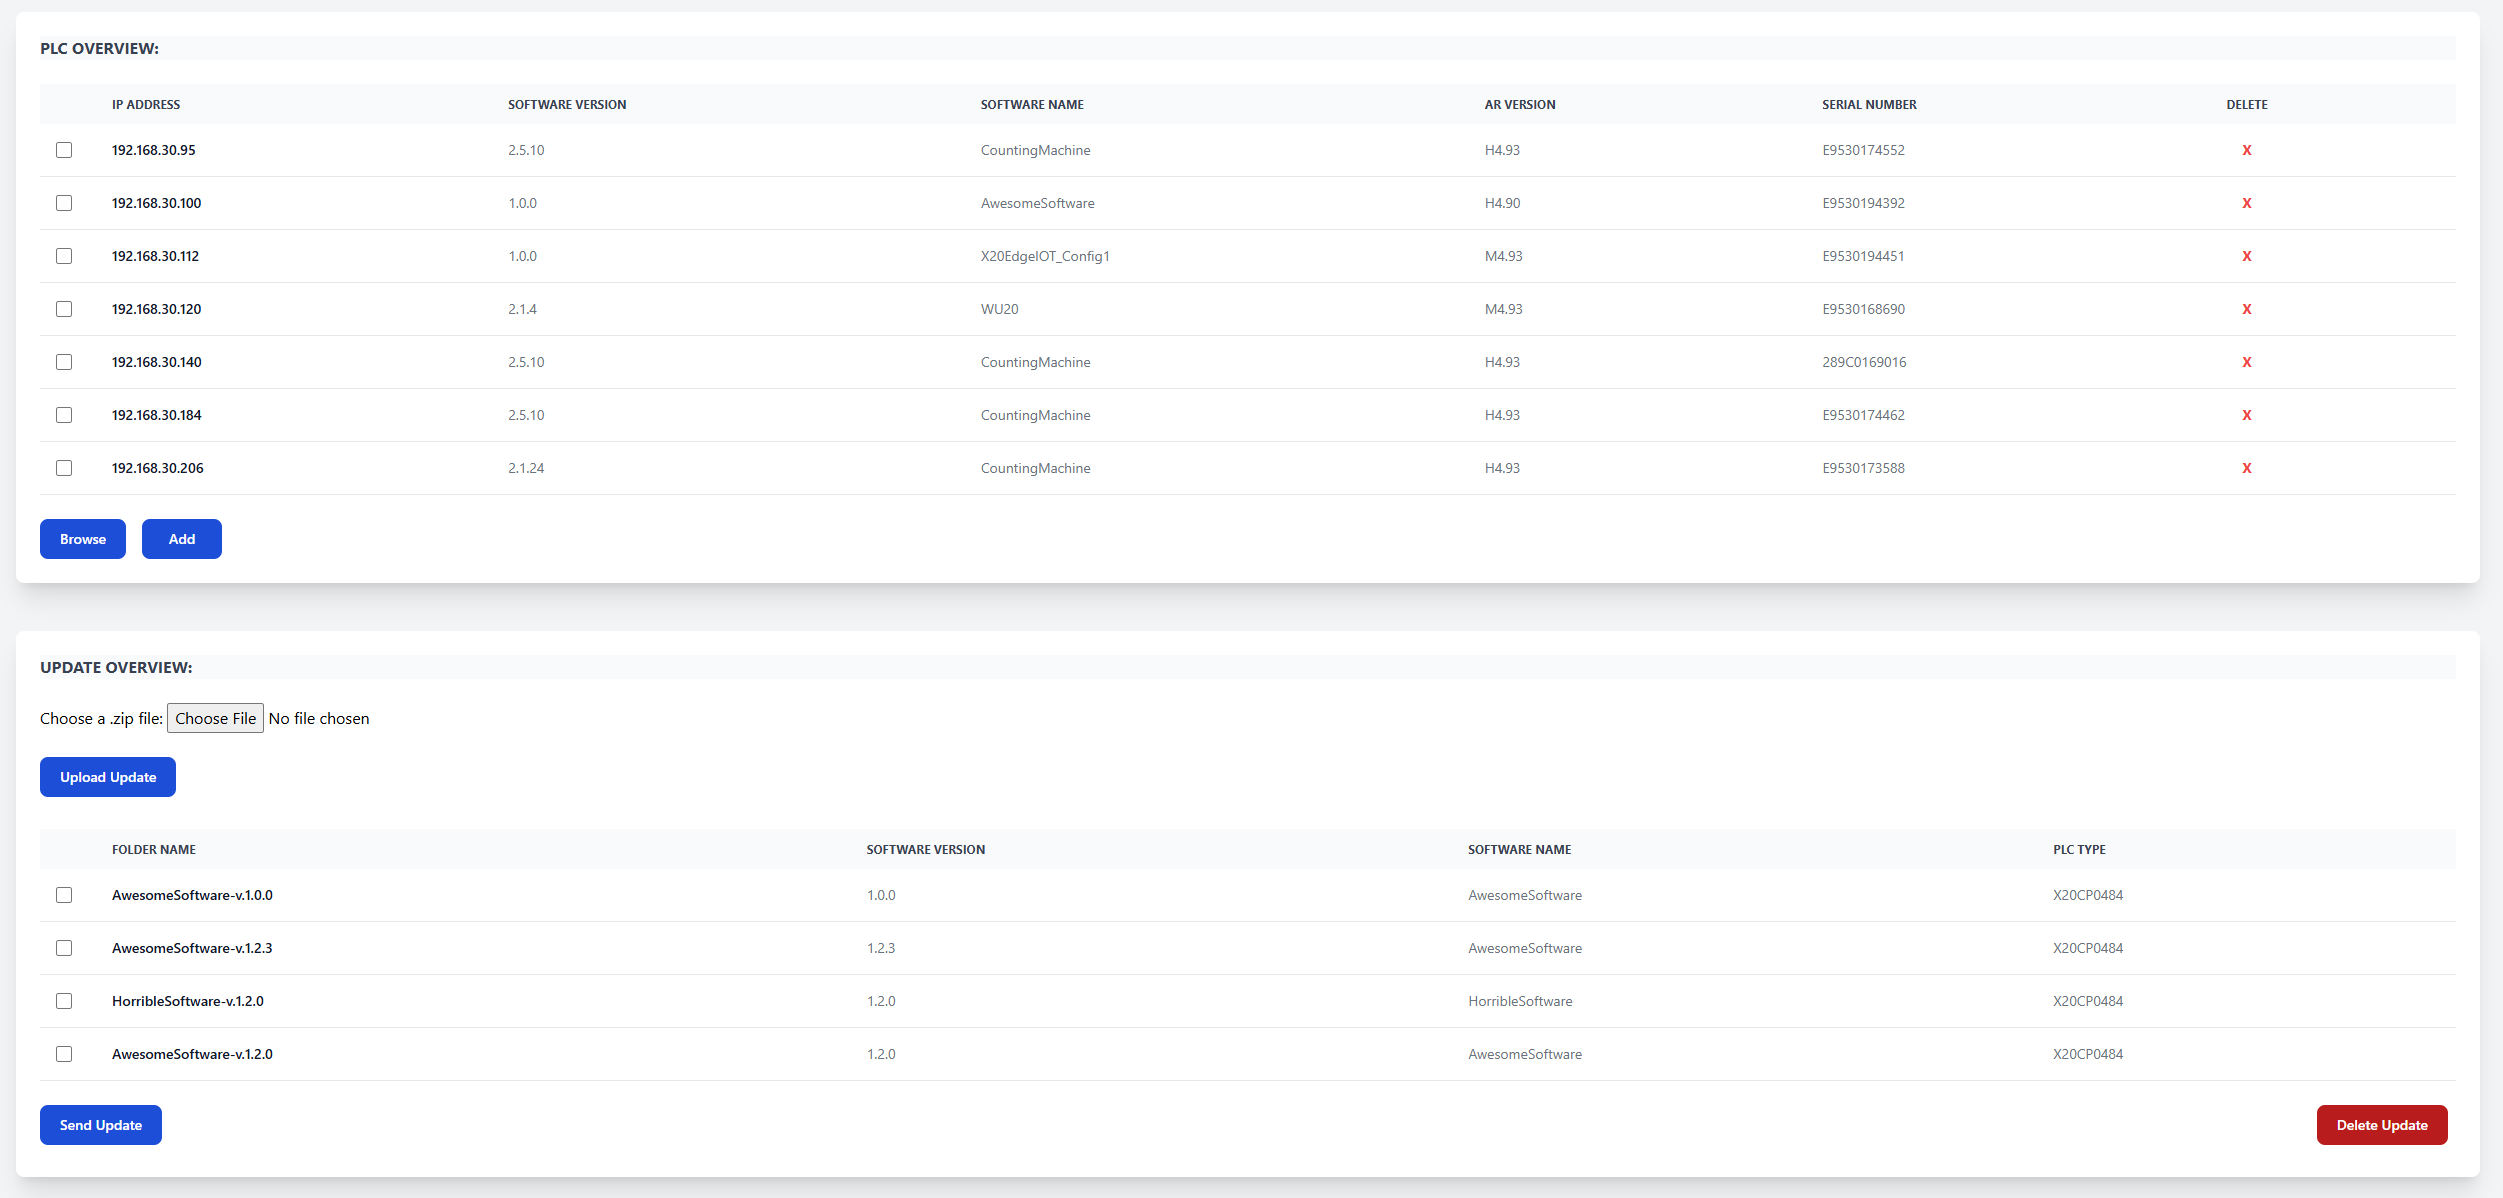
Browse
Explore the available B&R PLCs on the network.
Add a New Device
Use the interface to add a new device by specifying its IP address.
Upload Updates
Upload updates from the TestUpdates folder.
Delete an Update
Remove an update using the frontend controls.
Send an Update to a PLC
Try sending an update to a PLC. Use the shared PLC with IP address:
192.168.30.100
2. Pull Updates in PLC
Open the Automation Studio Project
Open the Automation Studio 4.12 project located in the PLC directory.
Connect to the PLC
The project is already downloaded. Open monitor mode on IP:
192.168.30.100
Program Features
The program reads the current software version in INIT using ArProjectGetInfo. Additionally, it can:
- 📥 Download Update from the Edge FTP server to the PLC FTP server.
- 🔄 Check Version of the update on the PLC FTP server.
- 🚀 Execute Update on the PLC FTP server.
Play Around with the Commands
Experiment with the different commands, but NOTE: Since we are sharing one PLC, you should only trigger a command if state = 10 (waiting state).
If you experience that state=222 it is an error state and can be cleared using reset=TRUE . It then return to state=10
3. Build Your Own OPC UA Image and Add It to docker-compose
📂 Locate the OPC UA Client
In the OpcuaClient directory, you will find the opcuaclient.py script, which polls and reads some nodes every 2 seconds. The nodes it will read are defined in nodesToRead.json. Your task is to Dockerize this OPC UA client.
📝 Create a Dockerfile
First, create a Dockerfile for the OPC UA client. You can look at the Dockerfile for the web server as inspiration. Note: Your Dockerfile needs to install asyncua, as this library is not included in Python by default:
# Install required dependencies
RUN pip install asyncua
Try to figure out out the rest by yourself.
🔨 Build and Run the Docker Image
Navigate to the OpcuaClient directory and build the Docker image:
cd OpcuaClient
docker build -t opcua-client .
You can then run your newly created image:
docker run --rm opcua-client
The
--rmflag ensures the container is removed after it stops.
If everything works you should see the OPC UA nodes in the terminal.
🏗️ Add the Image to docker-compose.yml
Now, integrate the new Docker image into your docker-compose.yml. To do this:
- Copy the existing
web:container configuration. - Rename it to something like
opcuaclient:. - Since the
Dockerfileis not in the same directory asdocker-compose.yml, modify the build section as follows:
opcuaclient:
  build:
    context: ./OpcuaClient
    dockerfile: Dockerfile
Try to figure out the rest.
▶️ Run All Containers Together
Once everything is set up, start all three containers:
docker-compose up -d
🎉 Enjoy your creation! 😃